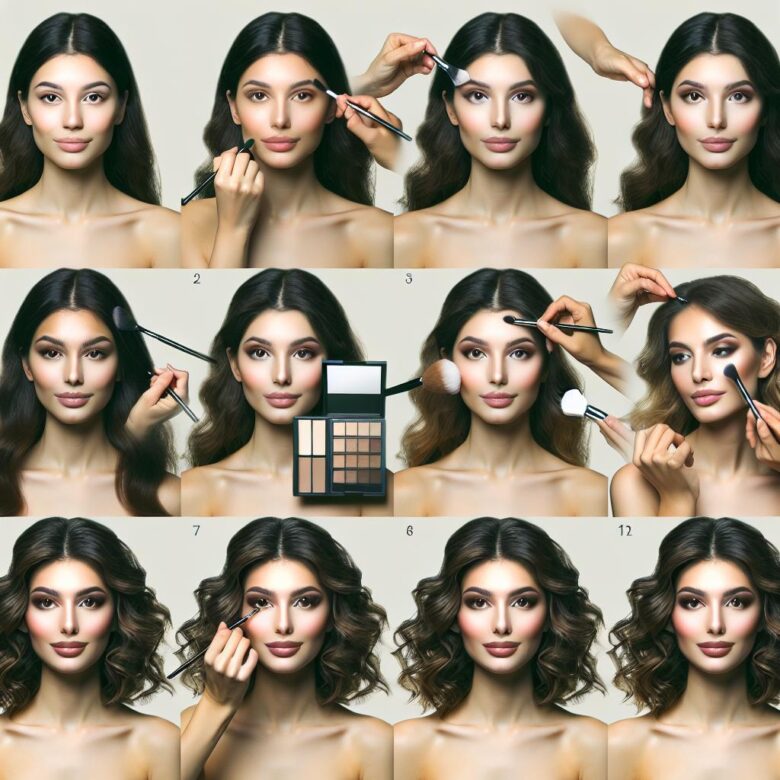
Doing your own wedding makeup can work well if you already feel comfortable applying makeup, want a recognizable version of your usual look and have time to rehearse the entire routine. The central challenge is not finding one supposedly perfect product. It is building a routine you can repeat calmly and checking how the combined skincare, sunscreen and makeup behave in your actual conditions.
A useful bridal trial should answer four questions: Does the makeup still look like you? Does it photograph as intended? Is it comfortable after normal eating, talking and movement? Can you correct fading or smudging without disturbing the rest of the face?
Is DIY bridal makeup the right choice?
Decide based on your experience, schedule and stress level rather than cost or expectations from other people.
DIY may suit you if you:
- Can already create a complete makeup look without step-by-step assistance.
- Prefer natural, classic or softly defined makeup rather than a major transformation.
- Can complete at least one full rehearsal that includes photographs and realistic wear.
- Have a well-lit, reasonably calm place to get ready.
- Can correct a small mistake without abandoning the routine or becoming overwhelmed.
- Are willing to write down the successful product order and prepare your tools in advance.
Professional help may be more practical if you:
- Rarely wear makeup or want techniques you have never practiced.
- Expect a tightly restricted preparation schedule.
- Need to prepare several people at the same location.
- Have an active skin or eye problem that makes cosmetic use difficult.
- Find that applying makeup under time pressure creates significant anxiety.
Hiring a professional is not an admission that you cannot do makeup. Likewise, doing it yourself does not require an elaborate routine. Choose the option that gives you the most predictable and comfortable morning.
How this guide was developed
This is an educational, source-based tutorial rather than a hands-on product test or a guarantee of all-day wear. It combines practical application planning with cosmetic-safety and skincare guidance from the U.S. Food and Drug Administration and the American Academy of Dermatology. Results will vary with skin condition, product combinations, weather, lighting and technique.
Define the look before buying anything
Create a short brief for the finished makeup. This prevents a trial from turning into a series of unrelated trends.
- Overall style: natural, softly defined, classic, romantic or glamorous.
- Complexion: sheer, medium or fuller coverage; radiant, natural or more matte finish.
- Eyes: soft shadow, defined liner, waterproof mascara and optional false lashes.
- Lips: comfortable traditional lipstick, longer-wear color or liner-and-gloss combination.
- Conditions: indoor or outdoor ceremony, likely heat or humidity, flash photography and expected opportunities for touch-ups.
Use photographs of your own trials as the main reference. Tutorials recorded under studio lighting may not show how the same placement will look on your features or in your venue.
Plan a complete bridal makeup trial
A trial should reproduce the intended wedding routine rather than test products in isolation. Use the same skincare, sunscreen, tools and application order you plan to use on the day.
- Arrange the products and tools in application order.
- Record when you begin and finish without deliberately rushing.
- Take front, side and three-quarter photographs in daylight.
- Take additional photographs in indoor light and with flash.
- Eat, drink, talk and move normally while wearing the makeup.
- Check the under-eyes, nose, smile lines, chin, eyelids and center of the lips as wear develops.
- Perform one realistic touch-up rather than continually correcting the makeup.
- Write down what separated, faded, transferred, felt uncomfortable or photographed differently than expected.
| Trial question | What to inspect | Possible adjustment |
|---|---|---|
| Does the base remain even? | Nose, chin, hairline, jaw and areas where products collect | Use thinner layers, reduce overlapping skincare or change where powder is applied. |
| Are the eyes comfortable? | Watering, smudging, lash lifting or adhesive discomfort | Change the placement or product; skip false lashes if they remain difficult. |
| Does the color photograph well? | Foundation match, brow intensity, blush visibility and lip undertone | Adjust one element at a time and photograph the revised look again. |
| Can it be repaired? | Oil, tears, faded lipstick and local separation | Practice blotting and targeted correction instead of adding another full layer. |
| Is the routine repeatable? | Application order, tools and points of hesitation | Write a shorter checklist and remove unnecessary products or techniques. |
Use the duration of a successful trial to plan the wedding morning, then add a generous buffer. Do not base the schedule on the fastest application you have ever completed.
What to put in your bridal makeup kit
Skin preparation
- A gentle cleanser and familiar moisturizer
- Your usual daytime sunscreen when appropriate
- An optional primer that solved a specific problem during the trial
- Clean tissues or blotting papers
Primer is not compulsory. A smoothing or shine-control formula may be useful in selected areas, but another full-face layer can create pilling or excess slip when it is incompatible with the products underneath.
Complexion products
- Foundation, skin tint or another tested base
- Concealer and optional color corrector
- Blush and optional bronzer or contour
- Targeted setting powder
- Optional setting spray
Treat terms such as “long-wear,” “transfer-resistant” and “24-hour” as manufacturer claims, not promises about your wedding. Confirm the formula’s appearance, comfort and compatibility during your own rehearsal. If you are comparing finishing products, Glow Theory’s setting spray guide explains the claims and trade-offs to examine.
Eyes and brows
- Brow pencil, powder or gel
- Eyeshadow primer when needed
- A small palette with the shades used in the successful trial
- Eyeliner and mascara
- Optional false lashes and the adhesive specified for them
Waterproof and water-resistant are not interchangeable descriptions, and neither guarantees that a product will resist tears, oil and rubbing equally well. Compare the label directions, removal requirements and your own comfort. See the related guide to waterproof mascaras and eyeliners for wedding tears for additional selection criteria.
Lips, tools and repairs
- Lip balm, liner and the exact lip color used in the trial
- Clean complexion, cheek and eye brushes
- A clean sponge or powder puff if used in the routine
- Spoolie, pencil sharpener and small mirror
- Cotton swabs, tissues, blotting paper and pressed powder
Comfort, fading pattern and ease of reapplication matter as much as transfer claims. The guide to choosing long-wear lipstick for special occasions covers these trade-offs in more detail.
What to verify before purchasing
- Whether the shade matches in daylight as well as indoor light
- Whether the label provides special application or removal instructions
- Whether the formula contains an ingredient you already know causes irritation
- Whether it works over the exact moisturizer, sunscreen and primer you plan to wear
- Whether the applicator is easy for you to control under time pressure
- Whether the product can be reapplied without becoming patchy or uncomfortable
Prepare clean tools and products
- Wash reusable brushes early enough for them to dry completely.
- Clean reusable sponges according to their care instructions.
- Sharpen pencils and clean the sharpener.
- Check pumps, caps and spray nozzles before packing the kit.
- Do not use a product with an unexpected smell, color or texture.
- Do not share products or applicators that directly contact the eyes or lips.
The American Academy of Dermatology provides additional advice on cleaning makeup brushes. Glow Theory also has a practical guide to cleaning and sanitizing makeup brushes.
Step-by-step DIY bridal makeup
1. Set up the workspace
Place products in the order you will use them. Keep a full-face mirror, a smaller detail mirror, tissues and cotton swabs within reach. Check the workspace in daylight if possible, but do not rely on one light source for the final inspection.
2. Apply familiar skincare and sunscreen
Cleanse gently and use products that already suit your skin. Allow each layer to settle. If the surface remains visibly wet or slippery, press away excess with a clean tissue rather than immediately covering it with primer or foundation.
Avoid introducing an unfamiliar exfoliant, facial oil or strong treatment on the wedding morning. Follow your sunscreen’s label and any individual medical advice rather than skipping sun protection because of generalized photography claims.
3. Use primer selectively
Apply a small amount only where it improved the trial—for example, around visible pores or an area that becomes shiny. Skip sections where the combination pilled, separated or emphasized texture.
4. Decide whether eyes or complexion come first
Start with eyes if you are using dark shadow, loose shimmer or another product likely to create fallout. Start with complexion if the eye look is simple and you prefer to balance the facial colors afterward. Neither order is universally correct; use the sequence you rehearsed.
5. Define the brows gradually
Brush the hairs into place and fill sparse areas with light strokes. Use less color at the inner brow, then add definition through the arch and tail. Step back from the mirror before making the brows darker—close-up inspection can encourage unnecessary correction.
6. Build the eye makeup in thin layers
- Apply eye primer if the selected shadows need it.
- Use a transition shade to establish the shape.
- Add depth near the outer corner a little at a time.
- Keep shimmer controlled so loose particles do not spread over the complexion.
- Check both eyes while looking straight ahead, not only with each eyelid closed.
Photographs may benefit from more definition than your everyday makeup, but that does not require dramatically darker shadow. The goal is a look that remains recognizable from both close and full-length distances.
7. Apply eyeliner, mascara and optional false lashes
Keep eyeliner in the position already practiced and allow it to set before touching the area. Apply mascara in controlled coats and remove obvious clumps while the formula remains workable.
False lashes are optional. Follow the lash and adhesive instructions rather than assuming every strip uses the same trimming, placement or drying method. Do not place a conventional strip underneath the natural lashes unless the product is specifically designed and labeled for that placement.
8. Apply foundation from the center outward
Start where you need the most evening of color, often around the center of the face, and blend outward. Use the product remaining on the brush or sponge near the hairline and jaw so those borders do not become unnecessarily heavy.
- Blend the first layer fully before adding more.
- Press or tap over areas where sweeping motions disturb texture.
- Compare the face and neck in more than one light source.
- Use concealer rather than another full layer when only a small area needs coverage.
9. Conceal only where needed
Place small amounts around inner under-eye darkness, isolated blemishes or redness that remains visible. Blend the edges into the base and keep the layer thin over expression lines. If product settles into a crease, tap out the excess before applying powder.
10. Restore color and dimension
Add blush first in a small amount, then assess it from a normal viewing distance. Bronzer can add warmth, while contour is intended to create shadow; they are not automatically interchangeable. Highlighter is also optional and may draw attention to texture or become more prominent under direct light.
Take a quick photograph before adding more pigment. Blush that appears balanced in a close mirror may look different in a full-length image, while highly reflective products can become more noticeable under flash.
11. Set strategically rather than covering the whole face
Press a small amount of powder onto areas that crease, become oily or may touch clothing. Use less over dry cheeks and expression lines. During later touch-ups, blot visible oil before deciding whether more powder is necessary.
12. Apply the rehearsed lip combination
If you used balm during preparation, remove the excess before applying color. Use liner only as practiced, apply lipstick in thin layers and follow the formula’s setting instructions. Check the teeth and inner lip before photographs, and carry the same color for repairs.
13. Use setting spray only if it helped during the trial
Follow the manufacturer’s distance and application directions. Close the eyes and mouth, mist evenly and allow the product to dry without touching the face. Skip it if the tested combination caused irritation, visible droplets or separation. Setting spray does not automatically make all underlying makeup waterproof.
14. Complete a full-face and camera check
- Inspect the jaw, hairline and ears for obvious color differences.
- Check that the eyes and brows look balanced.
- Look for mascara or lipstick transfer.
- Review the base around the nose, under-eyes and smile lines.
- Take photographs in daylight, indoor light and with flash.
Correct the overall imbalance first. A magnifying mirror may reveal normal pores and texture that will not be noticeable in conversation or photographs.
Adjust the routine for the setting
Hot or humid conditions
Use thinner skincare and complexion layers, concentrate powder where oil develops and choose eye products whose water-resistance claims you have tested. Blot before adding more makeup. Friction from tissues, clothing or repeated touching can still remove products labeled long-wearing.
Cold or dry conditions
Prioritize comfortable skin preparation and reduce powder over dry areas. If the base becomes flaky, repeatedly adding foundation or spray may make the buildup more visible. Address the specific area rather than coating the full face again.
Outdoor daytime ceremony
Test the makeup over the exact sunscreen you intend to use and inspect it in natural daylight. Do not assume one ingredient will always cause flash problems; take photographs with the complete routine under the relevant conditions.
Organize the wedding morning
| Stage | Plan | Avoid |
|---|---|---|
| Before starting | Eat, hydrate and put on clothing that will not need to be pulled over the finished makeup. | Beginning hungry or while products are still packed in bags and boxes. |
| Setup | Arrange products and tools in the order recorded during the trial. | Allowing drinks, hair products or unrelated items to crowd the makeup surface. |
| Application | Follow the written routine and pause for full-face checks. | Trying a new technique because you saw it shortly before the ceremony. |
| Final review | Take several photographs and inspect the jaw, eyes, cheeks and lips. | Attempting to erase every visible pore in a magnifying mirror. |
| Touch-up handoff | Give a small labeled kit to a trusted person and agree where it will be kept. | Carrying the complete makeup collection throughout the event. |
Pack a compact touch-up kit
- Blotting papers or clean tissue: remove surface oil before adding powder.
- Pressed powder: use only where shine or coverage loss is visible.
- Lip color: carry the exact liner, lipstick or compatible top coat from the trial.
- Cotton swabs: correct a dried mascara mark or lip edge without rubbing a wide area.
- Small mirror: identify the problem before adding another layer.
- Lash adhesive: include only if you are wearing false lashes and can use the correct adhesive safely.
- Small amount of concealer: repair an isolated area without carrying the full complexion kit.
How to correct common problems
Foundation begins separating
Press away surface oil, then tap the area with a clean sponge. Avoid immediately covering separation with more foundation; that can add buildup without repairing the layer underneath.
The complexion looks dry or powdery
Stop adding powder and remove loose buildup locally. Use a mist only if that exact product combination improved during the trial.
Concealer settles into lines
Tap out the collected product and remove excess before pressing on a very small amount of powder. Adding powder directly over a thick crease can make it more visible.
Mascara transfers to the eyelid
Allow the mark to dry, then lift it gently with a clean cotton swab. Rubbing wet mascara is more likely to spread the pigment.
A false-lash corner lifts
Follow the adhesive’s directions and keep it away from the eye itself. If the area is irritated or the lash cannot be repaired safely, remove it rather than repeatedly applying adhesive.
Blush looks too strong
Press over it with the complexion sponge or a brush carrying only a trace of base product. Avoid hiding it under a thick layer of powder.
Lipstick fades after eating
Blot food or moisture, remove loose pigment and reapply a thin layer where color is missing. Reapplying directly over crumbs, oil or peeling product can create an uneven result.
Cosmetic safety reminders
- Do not apply eye makeup in a moving vehicle.
- Do not use eye cosmetics during an active eye infection.
- Discard eye products that may have been contaminated during an infection.
- Check false-lash adhesive ingredients and follow the label.
- Stop using a cosmetic that causes burning, swelling, rash or persistent redness.
- Do not share mascara, eyeliner, lipstick or direct-contact applicators.
- Keep cosmetics away from open wounds and severely irritated skin.
- Do not create untested product mixtures in an attempt to improve wear.
- Seek appropriate medical help for a serious, painful or worsening reaction.
Frequently asked questions
How many bridal makeup trials are necessary?
There is no universal number. Continue until you can reproduce the complete look, understand how it wears and complete it without relying on an unfamiliar tutorial. At least one rehearsal should include normal activity, photographs and a realistic touch-up.
Should bridal makeup be heavier than everyday makeup?
Not necessarily. You may want slightly stronger eye, brow or cheek definition for photographs, but more product does not automatically create a better result. Controlled placement and an accurate shade match generally matter more than overall thickness.
Can I use my everyday foundation?
Yes, provided the complete routine looks and wears as intended in your trial. Familiarity can be valuable on a high-pressure morning. Do not replace a reliable base solely because another product is marketed as bridal or long-wearing.
Do I need false eyelashes?
No. False lashes are optional. A practiced eyeliner and mascara combination may provide enough definition. Skip lashes if they remain uncomfortable, irritating or difficult to apply consistently.
Will setting spray make the makeup waterproof?
Not necessarily. It may help some products look more cohesive or resist wear, but tears, sweat, skin oil and friction can still affect the makeup. Evaluate the exact combination rather than relying only on the finishing spray’s claims.
Should I skip sunscreen to prevent flash problems?
Do not abandon an appropriate sun-protection routine solely because of a generalized photography claim. Follow the sunscreen label and relevant medical advice, then photograph the exact sunscreen-and-makeup combination under the planned lighting.
The practical strategy
Start with a look that feels familiar and improve its durability through rehearsal rather than adding more products. Keep skincare straightforward, build complexion coverage only where needed, define the eyes gradually and apply powder selectively.
Record the successful order, photograph the result and practice one realistic repair. The most useful bridal routine is not the one with the most steps; it is the one you can reproduce calmly while remaining comfortable and recognizable.
Safety and skincare references

Glow Theory publishes research-based makeup and beauty guidance. Product comparisons distinguish documented specifications and source-based research from hands-on testing. The publication does not present manufacturer claims as independent test results and does not claim professional or medical credentials that have not been verified.