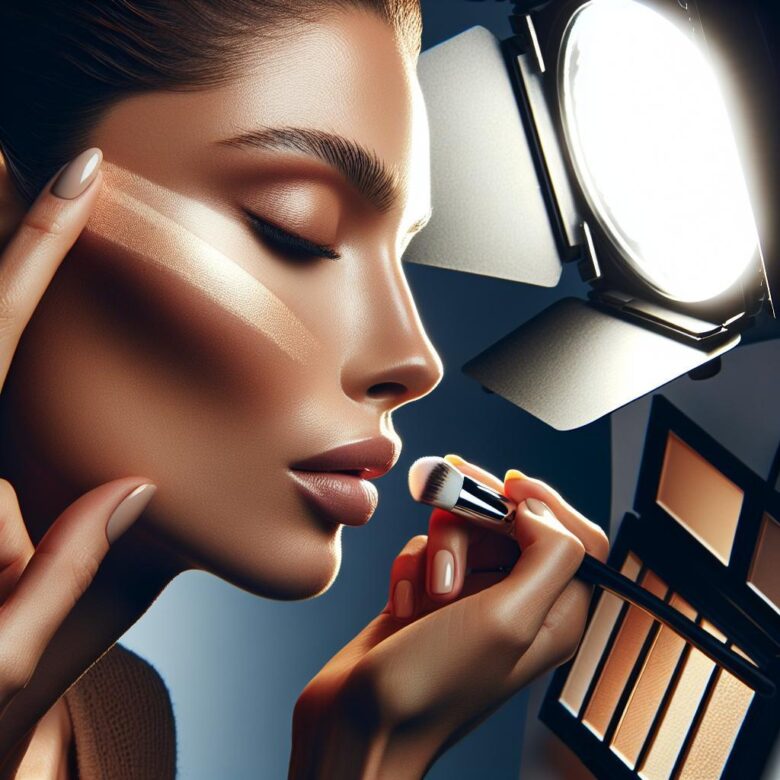
Contouring for flash photography is not simply a matter of applying darker contour or more highlighter. Direct flash can make abrupt edges, pale powder and reflective finishes more conspicuous, while bounced or off-camera light may show the same makeup differently. The useful goal is controlled dimension that remains believable both in photographs and in person.
The most reliable approach is to identify the planned lighting, apply thin layers and photograph the complete skincare-and-makeup combination before the event or session. A mirror check alone cannot show how camera exposure, flash direction and product reflection will interact.
How this guide was evaluated
This is a source-based technique guide, not a hands-on product test. Glow Theory did not conduct client sessions, camera calibration, laboratory analysis or ingredient-by-ingredient flashback testing. The guidance combines established makeup principles with official photography information about flash direction, light modification and exposure, plus independent cosmetic and sunscreen safety guidance from the U.S. Food and Drug Administration and American Academy of Dermatology.
Because cameras, complexions, formulas and lighting setups vary, no powder, contour or highlighter can be declared universally flash-proof. Product labels such as photo-ready or no flashback should be treated as manufacturer claims, not guarantees for a particular camera setup.
Start with the lighting setup
Flash is not one uniform type of light. Adobe’s introduction to flash photography and Canon’s guidance on modifying flash explain how direction and diffusion change shadows and highlights. Those differences should affect how strongly the face is sculpted.
| Lighting situation | What to watch for | Sensible starting point | What to verify |
|---|---|---|---|
| Direct on-camera flash | Visible makeup edges, concentrated shine and a flatter frontal appearance | Restrained contour, targeted powder and a soft satin highlight | Forehead and nose reflection, pale under-eyes and cheek-contour borders |
| Bounced or diffused flash | Softer transitions, although exposure and bounce surface still affect color | Moderate cheek definition and carefully blended luminosity | Whether the makeup remains visible without becoming heavy in person |
| Off-camera flash | Contour and texture changing as the light moves to the side or above the face | Placement based on the intended head angle and light direction | Front, side and three-quarter views under the planned setup |
| Unknown event lighting | Changing exposure, mixed room light and multiple photographers | A conservative, balanced look rather than an extreme camera-only result | At least one direct-flash image and one image without flash |
A phone-flash photograph can reveal an obvious white patch, reflective stripe or shade mismatch, but it is only a screening tool. Phones may automatically change exposure, white balance, sharpening and skin detail. When possible, give greater weight to a test made with the actual camera, flash direction and approximate subject distance.
Keep contour, bronzer and highlighter in separate roles
Using one dark, warm product for every purpose often creates an orange stripe rather than believable depth. Decide what each area needs before adding pigment.
| Product | Purpose | Finish to consider | Common flash-photo problem |
|---|---|---|---|
| Contour | Suggest depth around existing facial structure | Matte or very low sheen | A dark, unblended line extending too close to the mouth |
| Bronzer | Add warmth and restore color to the complexion | Matte, satin or subtle luminosity | Orange warmth being mistaken for a natural shadow |
| Highlighter | Create a controlled point of reflection | Satin or fine sheen for natural portraits; metallic for an intentional dramatic effect | A pale or intensely reflective patch with little visible skin detail |
| Brightening concealer | Correct darkness and selectively brighten | Natural, satin or flexible matte | A large under-eye area that looks disconnected from the face |
| Setting powder | Control movement, creasing and unwanted shine | Thin, targeted application | Pale buildup, dryness or residue caught in facial hair |
Choose contour by undertone and depth
A contour should resemble plausible depth on the individual complexion. That does not mean every contour must be gray, nor does it require a fixed number of shades darker than foundation.
- Cool or rosy complexions: muted taupe-brown or neutral contour may look more natural than distinctly golden bronzer used as a shadow.
- Warm or golden complexions: neutral-brown or softly warm-neutral depth may be more cohesive than a pale gray shade.
- Olive complexions: look for muted brown or olive-compatible depth rather than strongly orange or pink tones.
- Deep and rich complexions: assess richness as well as undertone. A shade can look ashy because it is too pale, even if it is marketed as cool contour.
Always assess the shade over the foundation intended for the photograph. Foundation, powder, bronzer and camera white balance can all change how the contour appears. A hand swatch does not show how the complete combination will photograph on the face.
Cream versus powder contour
Neither format is automatically better for flash. Cream can create a gradual transition but may disturb foundation if repeatedly blended. Powder can be easier to build in small increments, although it may catch on an unset base or dry texture. A cream-and-powder combination can add longevity, but it also increases the risk of excessive depth.
Choose according to the base and your application control. If using both formats, keep each layer lighter than it would be when worn alone.
Place contour according to the face, not a fixed diagram
Face-shape charts can offer ideas, but they cannot account for individual bone structure, asymmetry, camera angle or the desired result. Check placement from normal portrait distance rather than judging only in a magnifying mirror.
Cheeks
Begin near the outer cheek where natural depth appears when the face turns. Keep the most concentrated pigment near the hairline and soften the front edge. Extending a strong line toward the mouth can pull the face downward and become conspicuous under direct flash.
Jawline
Jaw contour is optional. If used, blend it into the surrounding complexion and inspect it from the side as well as the front. A continuous dark border can separate the face from the neck; adding heavy makeup to the entire neck usually creates another matching problem rather than solving the first.
Forehead and hairline
Decide whether the area needs shadow, warmth or neither. Use a small amount and avoid depositing powder directly into the hair. Check for a dark semicircle around the forehead and for pale powder collecting at the hairline.
Nose
Nose contour should follow the person’s structure rather than two identical lines applied to every face. Work with a small brush and little product. Strong dark sides combined with a metallic center highlight can produce more contrast than expected in a frontal flash photograph.
Temples and eye area
A trace of depth can connect eye makeup to cheek sculpting, but a cool shade placed too widely may resemble discoloration. Using the small amount left on the brush is often more controllable than picking up fresh product.
Select highlighter for the intended photograph
The right finish depends on whether the goal is natural portrait dimension or a deliberately reflective editorial effect.
- Satin or soft sheen: a practical starting point for weddings, headshots and event portraits because it provides light without relying on obvious glitter.
- Fine luminous cream: may blend smoothly with a compatible base, but it can move foundation if rubbed on after powder.
- Metallic or glitter finish: creates a stronger creative effect and is more likely to form a concentrated reflective area. Test the exact angle and exposure.
Highlighter depth matters as much as undertone. A shade that is much lighter than the complexion may look like a pale stripe when it is not directly reflecting light. Pale pearl and champagne shades may integrate with lighter complexions, while richer gold, bronze, copper or deep champagne may sit more naturally on deeper skin. These are starting points, not fixed rules.
Use selective placement
- Upper cheek: place a small amount where the cheek naturally catches light. Avoid extending it across texture you do not want to emphasize.
- Brow bone: keep the application near the outer brow if full-width frost competes with the eye makeup.
- Nose: use sparingly. A bright line and reflective tip can become the visual center of a direct-flash portrait.
- Cupid’s bow: check the result after lipstick because reflective product can transfer or create an isolated bright point.
Apply the complexion in thin, adjustable layers
- Use familiar skincare and sunscreen. Allow each layer to settle according to its directions before applying makeup.
- Even the complexion where needed. An unnecessarily thick foundation layer can make later edges and texture harder to correct.
- Map contour with minimal product. Start at the outer face and complete one section before adding more elsewhere.
- Diffuse visible borders. Use a clean portion of the brush or sponge rather than spreading dark pigment over a larger area.
- Add bronzer separately. Use broader placement when warmth is needed instead of making the contour more orange.
- Assess existing reflection. Skincare and foundation may already provide enough luminosity in some areas.
- Add highlighter selectively. Build only after checking the face from the planned camera angles.
- Set targeted areas. Tap out creases first, then press on a small amount of powder where movement or oil is likely.
- Take a photograph before intensifying the look. Correct one issue at a time so the effect of each change is clear.
If under-eye creasing is the main concern, the application advice in Glow Theory’s guide to concealer and fine lines can help refine that area without relying on a heavy powder layer.
Diagnose flashback before changing products
Flashback is an informal term for an unexpectedly pale or bright area in a flash photograph. The image alone does not prove that one ingredient caused it. Product shade, quantity, reflective finish, skin oil, uneven application, flash distance, exposure and image processing can all influence the result.
No source cited here establishes a universal rule that every product containing silica, zinc oxide or titanium dioxide will produce the same photographic result. An ingredient list is therefore not a substitute for testing the complete routine.
| What the photograph shows | Check first | Possible makeup adjustment |
|---|---|---|
| The entire face and background are very bright | Camera or flash exposure | Do not keep adding powder to correct a lighting problem |
| Only the under-eyes look pale | Concealer shade and powder quantity | Remove excess and use a shade closer to the surrounding complexion |
| Cheekbones show bright reflective patches | Highlighter finish and placement | Press over the area with a complexion sponge or replace metallic shine with satin |
| Powder is visible around brows, hairline or facial hair | Uneven residue | Brush away excess and use less product during the next application |
| The face looks different from the neck | Foundation shade and jaw blending | Correct the base match and soften the transition rather than darkening the whole neck |
Do not skip appropriate sun protection solely to improve a photograph. The FDA’s sunscreen guidance explains the role of sunscreen in reducing ultraviolet exposure. Use sunscreen according to its label rather than mixing or diluting it with foundation. The American Academy of Dermatology also provides guidance on layering skincare, sunscreen and makeup.
Run a realistic rehearsal
A useful rehearsal tests the whole routine, not an isolated contour swatch.
- Use the skincare, sunscreen and complexion products intended for the event.
- Apply contour, bronzer, blush, highlighter and powder in the planned order.
- Allow setting products to dry according to their labels.
- Take front, three-quarter and side photographs.
- Use the planned flash or the closest setup available.
- Take a comparable photograph without flash.
- Review the full image at normal size before zooming into pores or individual hairs.
- Check the under-eyes, forehead, nose, cheek edges, hairline, jaw and neck transition.
- Change one variable at a time and take another photograph.
- If the makeup must last through a long event, repeat the check after a representative period of wear to assess oil, transfer and creasing.
Adobe Lightroom users can consult Adobe’s explanation of shadow and highlight clipping indicators. A clipping warning can help identify lost highlight detail, but first determine whether the whole photograph is overexposed. Makeup should not be blamed for a camera-setting problem affecting the complete image.
For a wedding rehearsal, use this test alongside the broader steps in Glow Theory’s bridal makeup tutorial. If setting spray is part of the planned routine, apply it during the rehearsal rather than introducing it for the first time on the event day; this comparison of long-wear setting sprays explains the relevant claims and trade-offs.
Common problems and focused corrections
Contour looks like a stripe
Soften the front and lower edge with a clean brush or sponge. If necessary, tap a trace of foundation over the border. Avoid blending the dark product farther across the cheek.
Contour looks orange
The shade may be better suited to bronzing than sculpting. Use it more broadly and lightly as warmth, or choose a more muted contour tone.
Contour looks gray or ashy
The shade may be too cool, pale or desaturated for the complexion. Reduce it, add compatible warmth around—not directly over—the shadow, or choose a richer neutral tone.
Highlighter becomes a white patch
Press over it with the complexion sponge and reassess. If the pale cast remains when the product is not reflecting light, choose a deeper or less metallic shade.
The forehead is excessively shiny
Blot surface oil before adding powder. Set only the reflective area, then take another photograph instead of mattifying the complete face automatically.
Makeup photographs well but looks heavy in person
Prioritize where and how the makeup will actually be seen. Event and bridal makeup usually needs to work at conversational distance as well as in photographs, so a compromise is often more useful than optimizing for one direct-flash image.
What to verify before buying a new product
- Whether the contour is muted enough for your undertone and deep enough to create dimension without looking ashy.
- Whether the highlighter leaves a pale base when it is not catching light.
- Whether a cream or powder formula is compatible with the intended foundation.
- Whether the product can be sampled or returned if the shade does not work.
- Whether photo-ready or flashback claims come from the manufacturer or from a clearly described independent test.
- Whether the formula causes irritation when used according to its label.
- Whether the result remains acceptable in ordinary light, not just in one close-up photograph.
Safety and hygiene
The FDA recommends reading cosmetic labels, using products as directed and stopping use if a reaction occurs. See its guidance on using cosmetics safely. Do not apply makeup over open wounds or severely irritated skin, and seek appropriate medical care for a serious or worsening reaction.
Use clean tools, keep containers closed and avoid sharing direct-contact applicators. The American Academy of Dermatology explains why and how to clean makeup brushes. Glow Theory also has a practical guide to cleaning and sanitizing makeup tools.
Frequently asked questions
Should contour be darker for flash photography?
Not automatically. Direct frontal flash may make natural facial shadows less apparent, but substantially darker contour can create a visible stripe. Start with a normal, restrained application and build only if the test photograph needs more dimension.
Is cream or powder contour better for flash?
Either can work. Compatibility with the base, shade, amount and blending are more important than the format alone. Cream may merge more gradually with foundation, while powder may be easier to build in small increments.
Should highlighter be avoided?
No. Satin or finely reflective highlighter can add controlled dimension. Reduce it when the photograph shows an isolated bright patch or when the base color looks too pale for the complexion.
Is baking necessary?
No. Baking may suit some routines, but a broad, heavy powder layer can emphasize dryness or look pale. Try a smaller targeted application and verify it with flash before committing to extensive baking.
Can setting spray guarantee there will be no flashback?
No. A setting spray may help makeup layers appear more cohesive, but it cannot guarantee control of exposure, oil, pale product shades or metallic reflection. Test it as part of the complete routine.
A practical final checklist
- Confirm whether the flash will be direct, diffused or off-camera.
- Choose contour for believable depth, not maximum darkness.
- Use bronzer separately when the face needs warmth.
- Match highlighter depth and reflectivity to the intended photograph.
- Apply powder only where movement, creasing or oil requires it.
- Keep necessary sunscreen in the routine and use it according to the label.
- Photograph the full look from several angles with and without flash.
- Correct local makeup problems without using makeup to compensate for an overexposed image.
- Make sure the finished look remains wearable in person.
The strongest safeguard is not a particular ingredient list or product label. It is a complete rehearsal under lighting that resembles the final conditions, followed by small, deliberate adjustments.
Photography references

Glow Theory publishes research-based makeup and beauty guidance. Product comparisons distinguish documented specifications and source-based research from hands-on testing. The publication does not present manufacturer claims as independent test results and does not claim professional or medical credentials that have not been verified.