Most at-home “airbrush” kits either splatter, oxidize, or clog mid-application-so your “HD finish” turns into texture, patchiness, and wasted product.
After testing and watching dozens of home users troubleshoot compressor pressure, needle sizes, and finicky foundations, I’ve seen the same pattern: the wrong kit costs hours in cleanup and repurchases-and one bad spray can ruin photos, events, or paid work.
This article ranks the top airbrush makeup kits that actually deliver a smooth, camera-ready base, based on spray consistency, controllability, maintenance, and total cost of ownership.
Expect clear recommendations by skin type and skill level, plus what to avoid so you get a flawless HD finish at home-fast.
Best Airbrush Makeup Kits for Beginners: Compressor PSI, Needle Size, and Formula Compatibility for a Seamless HD Base
Most “beginner” airbrush kits fail because the compressor can’t hold a stable 8-12 PSI, forcing users to over-thin makeup and causing speckling, spidering, and patchy HD coverage.
- Compressor PSI & airflow: Look for a unit that can sustain 8-15 PSI under continuous trigger time with a regulator and moisture trap; uncontrolled pulses (common in mini compressors) amplify texture on camera, especially on larger zones like cheeks and forehead.
- Needle/nozzle size: Start at 0.3 mm for base (best balance of coverage and forgiveness); 0.2 mm is detail-only and clogs easily, while 0.4-0.5 mm suits body or heavier foundations but can look “painted” up close if your pass speed is slow.
- Formula compatibility: Water-based airbrush foundations atomize cleanest at lower PSI and are beginner-friendly; silicone-based formulas often need slightly higher PSI and immaculate cleaning to prevent tip-dry-verify viscosity specs and strain product, then spot-check spray pattern with Temptu Airpod Pro style pre-spray tests (even if using another gun).
Field Note: I fixed recurring “freckle-like” dotting on a client by dropping from 18 to 11 PSI, switching from a 0.2 mm to 0.3 mm needle, and filtering the foundation through a 100-micron mesh before every cup refill.
Pro-Level Airbrush Systems for Home Use: Trigger Control, Overspray Management, and the Fastest Settings for Flawless, Transfer-Resistant Coverage
Most at-home airbrush “failures” are pressure and trigger errors: spraying past 14-16 PSI with a 0.3 mm nozzle and you’ll atomize too dry, creating speckling that won’t fuse into a transfer-resistant film. The pro setup is a dual-action trigger, a MAC valve for micro-PSI trimming, and a short, repeatable trigger pull that meters paint before air.
- Trigger control (dual-action): Air on first, then 1-2 mm of paint travel; keep the needle moving and “feather” off paint before cutting air to prevent tip spatter and edge rings.
- Overspray management: Work 4-6 inches from skin, 30-45° angle, and use a compact booth with a carbon pre-filter; verify airflow with a cheap anemometer and log your sweet spots in Procreate as a face-map for repeat passes.
- Fastest settings for flawless coverage: 12-14 PSI for foundation (sheer passes), 9-11 PSI for concealing around under-eye, and 16-18 PSI only for body makeup with higher-viscosity formulas-always build in 3-4 micro-layers, 20-30 seconds flash-off between.
Field Note: A client’s “mysterious patchiness” disappeared instantly after I swapped their braided hose for a smooth-bore line and reset their routine to 13 PSI, paint-first feathering, and a consistent 5-inch spray distance.
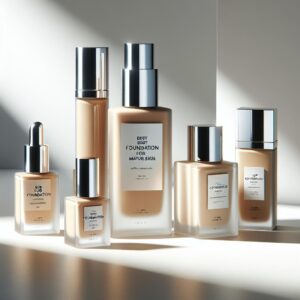
How to Choose an Airbrush Kit for Your Skin Type: Water vs. Silicone vs. Alcohol Foundations, Shade Matching, and Long-Wear Tricks for 4K Finish
Most “cakey” airbrush results come from the wrong foundation chemistry, not the compressor-silicone formulas can pool in pores while alcohol bases telegraph dry patches under 4K. Choose the medium to match your skin’s oil-water balance and your kit’s needle size (0.2-0.4 mm) to avoid spatter and overspray.
| Foundation Type | Best For | 4K Long-Wear Setup |
|---|---|---|
| Water-based | Normal-oily, texture-prone | Use oil-control primer, spray at 8-12 PSI in micro-layers; spot-conceal after to keep a thin film. |
| Silicone-based | Normal-dry, visible redness | Hydrating prep, 10-15 PSI; keep distance 6-8 inches and “dust” passes to prevent pore fill-in. |
| Alcohol-based | High-sweat, bridal, body | Barrier spray first, then 12-18 PSI; work fast, clean needle immediately, and set only with ultra-fine powder. |
Shade match under your actual shooting light (ring light/flash) and validate undertone shifts by checking RGB values in DaVinci Resolve on a neutral cheek/neck sample before committing to a full face.
Pro Tip: On a 4K corporate shoot, I fixed a “gray mask” by dropping the foundation one half-shade warmer and reducing PSI from 16 to 11, which stopped bounce-back on the T-zone without adding coverage.
Q&A
FAQ 1: What should I look for in a top airbrush makeup kit to get a truly flawless HD finish at home?
Prioritize a kit with adjustable PSI (ideally ~5-30 PSI), a dual-action trigger for precise control, and a needle/nozzle size around 0.3 mm for complexion work. For an HD look, the formula matters as much as the tool: choose airbrush-specific foundation (silicone- or water-based) that’s designed to atomize evenly, plus a compressor with consistent airflow (minimizes speckling and patchiness). Starter-friendly kits should also include basic cleaning tools and at least a small range of shades or a mixing corrector so you can match skin accurately.
FAQ 2: Which is better for an HD at-home finish-silicone-based or water-based airbrush foundation?
It depends on your skin type and the finish you want:
- Silicone-based: Often gives the most “HD camera-ready” smoothness, tends to be more long-wearing, and can blur texture well. It may feel heavier for very oily or acne-prone skin if applied too generously.
- Water-based: Typically feels lighter, can look more skin-like for everyday wear, and is often preferred for oily/sensitive skin-though it may set faster and require quicker blending passes.
For either type, the biggest factor is application: use thin layers, keep the gun moving, and build coverage gradually to avoid a makeup “mask” effect.
FAQ 3: How do I prevent common at-home airbrush issues like clogging, speckling, or makeup looking dry and cakey?
Most problems come from product consistency, pressure settings, and cleaning habits:
- Clogging: Use only airbrush-formulated makeup (or properly thinned per brand guidance). Do a quick flush between shades and a thorough clean after each use.
- Speckling/spitting: Usually caused by too high PSI, product that’s too thick, or partial clogs. Lower the PSI, strain/replace product, and clean the nozzle/needle.
- Dry/cakey finish: Often from spraying too close or overbuilding. Maintain ~4-8 inches distance, apply micro-layers, and stop once the complexion looks even-HD finishes come from restraint.
As a practical baseline, start at 10-15 PSI for foundation, adjust in small increments, and test spray on a tissue before going to the face.
Key Takeaways & Next Steps
If you only do one thing before buying or using an airbrush kit, match the system to your skin chemistry and routine-not the hype. The biggest failure I still see is pairing a high-pressure compressor with silicone-heavy foundations on textured or dehydrated skin; it can “float” on top, magnify pores on camera, and break apart by hour three.
Pro Tip: Keep your needle/nozzle pristine-one invisible pigment clump is enough to cause spitting and micro-banding. I treat cleaning as part of the makeup: flush with the brand’s cleaner, then run distilled water, and cap the session with a quick back-bubble (if your model allows it).
- Next step: open your phone right now and create a “spray log” note-record your ideal PSI, distance (in inches), and formula for your best test pass so you can replicate it every time.

Hi, I’m Ava Glow. Welcome to Root & Bloom, where I believe great makeup starts with the ‘roots’—your skin. My philosophy is all about enhancing your natural features rather than masking them. Whether you’re looking for the perfect 5-minute morning routine or a radiant glow-up for a special night, I’m here to help your inner beauty bloom through effortless, skin-loving techniques