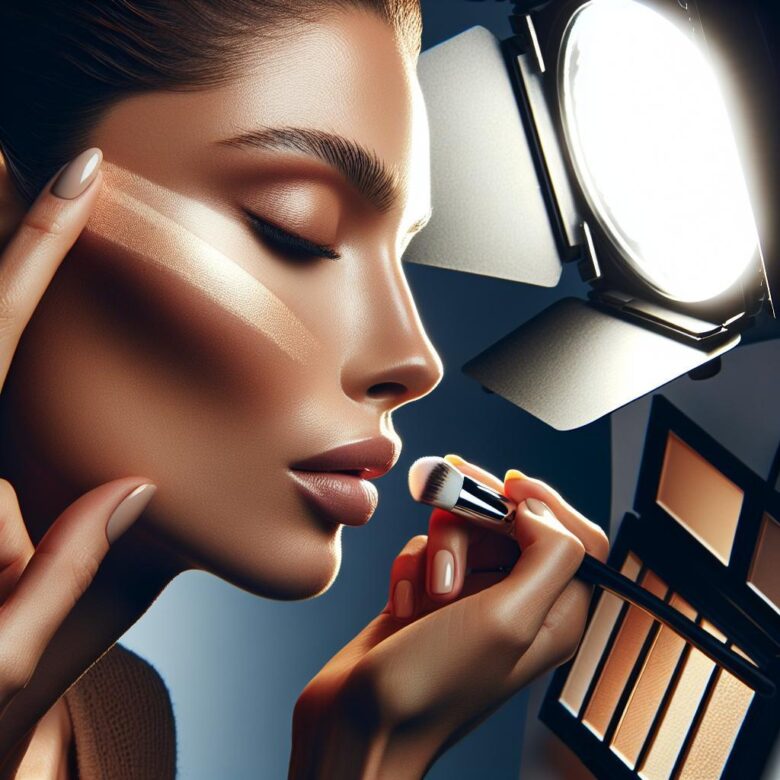
Flash doesn’t “wash you out”-it exposes every harsh shadow, muddy contour, and reflective hotspot your everyday makeup hides.
After years of prepping faces for editorial shoots and reviewing countless client galleries, I’ve seen one mistake ruin entire sets: makeup built for bathroom lighting, not a strobe. The cost is real-extra retouching hours, rejected images, and brides who hate their photos.
This article gives you the exact approach to contouring and highlighting for flash: where to place depth so it reads clean on camera, which highlights stay luminous without glare, and how to choose products and tones that won’t turn ashy, orange, or oily under direct light.
By the end, you’ll know precisely what to sculpt, what to soften, and what to skip so flash photos look polished-without relying on Photoshop.
Flash-Proof Contour Placement: Mapping Cheekbones, Jawline & Nose to Avoid Harsh Shadows and “Mud” on Camera
Direct flash collapses facial micro-shadowing, so contour placed even 5-8 mm too low reads as a dirty stripe rather than structure. The most common mistake is “Instagram placement” instead of bone-mapped placement, which flash turns into flat brown bands and muddy midtones.
- Cheekbones: Map the zygomatic arch by palpation; place contour on the underside of the bone (not in the hollow), stopping under the outer iris line to avoid a flash-cast crescent shadow. Keep the top edge soft and lifted toward the tragus, and avoid extending onto the apple where flash hotspot will exaggerate texture.
- Jawline: Anchor just under the mandibular edge, then blend downward onto the neck to prevent a “floating jaw” cut line. Under flash, a hard edge at the jaw reads as a gray border, so diffuse with a clean brush and match undertone to surrounding skin.
- Nose: Run contour along the sidewalls starting below the inner brow head, tapering before the ball; avoid shading the tip, which flash reflects and darkens adjacent product into “mud.” Keep the bridge highlight narrow and matte-satin to prevent blown-out hot spots.
Field Note: While tethering into Capture One Pro, I corrected a client’s “muddy” nose by moving the side contour 6 mm outward and switching the bridge highlight from pearlescent to satin, eliminating the flash flare in two test pops.
Highlight Without Blowout: Choosing Finishes, Shades & Placement That Won’t Reflect White Under On-Camera Flash
Direct on-camera flash can push reflective particles into 255-level hotspots, turning “glow” into a stark white patch on cheeks, brow bone, and nose. The most common mistake is using pearl/metallic highlighter or too-light concealer on elevated planes that sit square to the lens.
- Finish selection: Choose satin or “radiant” creams/liquids with fine, low-shimmer mica; avoid frosts, metallic powders, and large glitter. If you must powder, pick a micro-milled satin formula and press-not sweep-to reduce surface reflectivity.
- Shade calibration: Keep highlight within 0.5-1 shade of the surrounding skin (not lighter than the center of the face), and match undertone (golden for warm, rosy for cool) to prevent ashy flashback. Check in Capture One Pro by toggling the Exposure Warning to catch clipping before it hits print.
- Placement for flash geometry: Pull highlight off the highest, forward-facing points: skip the tip/bridge center, cupid’s bow, and center forehead under hard flash; instead place on the upper cheekbone slightly lateral, the brow bone outer third, and a thin C-shape at the temple where angles deflect light away.
Field Note: On a corporate headshot set, I eliminated recurring “white stripe” on the nose by moving highlight 3-4 mm to the side plane and switching from a pearl powder to a satin cream, confirmed by zero clipping flags in tether.
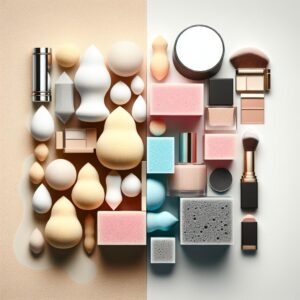
Product, Powder & Setting Strategy for Flash Photography: Preventing Flashback, Texture Emphasis, and Patchiness in High-Resolution Shots
Direct flash can add 1-2 stops of apparent brightness to high points, and that’s enough to turn mineral SPF, talc-heavy powders, and “HD” silica into white casts. The most common mistake is stacking reflective layers (SPF + luminous base + bright bake) and expecting the camera to “balance it out.”
| Risk | What Causes It | Flash-Safe Strategy |
|---|---|---|
| Flashback | High-reflective particles (silica, titanium dioxide, zinc oxide), lightened under-eyes | Use camera-tested translucent powders with low silica; match brightening concealer to neck, not monitor; confirm via tether in Capture One Pro |
| Texture Emphasis | Over-mattifying on dry zones, heavy powder on peach fuzz, micro-shimmer highlight | Micro-set only T-zone; press powder with a velour puff, then sweep excess; choose satin (not pearl) highlight on high plane |
| Patchiness | Powder over tacky foundation, uneven primer/sunscreen, mismatched emollience | Let base “set” 3-5 minutes; spot-powder after blotting; use a fine mist to re-melt edges before reapplying contour |
Field Note: On a 45MP corporate headshot day, I eliminated under-eye flashback by swapping a silica-heavy “HD” powder for a low-silica blend and verifying the change instantly on tether, saving a full re-edit pass of brightened eye sockets.
Q&A
FAQ 1: Why does my contour and highlight look harsher or “muddy” in flash photos compared to real life?
Flash flattens shadows and increases contrast, so heavy contour can read as a distinct stripe instead of a soft shadow-especially if the product is too warm, too deep, or not fully blended. Choose a contour that’s more neutral/cool (true shadow tone), apply with a lighter hand than you would for natural light, and blend beyond where you think you need to. Avoid placing contour too close to the mouth corner or too low on the cheek; in flash it can drag the face down.
FAQ 2: What products and finishes photograph best with flash-powder, cream, matte, or shimmer?
- Contour: Matte is safest. Cream contours look natural if set lightly; overly dewy creams can reflect flash and reduce definition.
- Highlight: Fine-milled, satin or “soft sheen” formulas photograph better than chunky glitter. High-shine metallics can create blown-out hotspots on the cheekbone and brow bone.
- Setting: If you use creams, set selectively with a thin veil of powder to prevent sliding and to control flash reflection.
FAQ 3: How do I avoid flashback and weird white casts while still highlighting?
Flashback usually comes from ingredients that reflect flash (commonly high-SPF mineral sunscreens with zinc oxide/titanium dioxide, and some silica-heavy powders). To prevent it, use a flash-safe base (avoid high-SPF mineral layers under makeup for flash shoots), choose translucent powders tested for photography, and keep brightening powders mainly in small, thin placements rather than broad baking. For highlighting, prefer a tinted or skin-tone-appropriate sheen product instead of a stark, pale “icy” shade that can turn white in direct flash.
Wrapping Up: The Ultimate Guide to Contouring and Highlighting for Flash Photography Insights
Pro Tip: The biggest mistake I still see on flash sets is contouring too close in tone to the base-flash flattens that effort and turns “sculpted” into dull. Build separation with undertone, not darkness: use a neutral-cool contour and a restrained highlight that dries down, then lock it with a micro-milled powder so it doesn’t bloom into a hotspot.
Do one test you can’t skip: take two phone photos right now-one with flash, one without-then zoom in on the high points (forehead, cheekbone, nose). If you see a sharp white flare or gray shadow line, adjust before you ever step in front of a real strobe.
- Open your camera app, enable flash, shoot at arm’s length, evaluate shine and edges.

Hi, I’m Ava Glow. Welcome to Root & Bloom, where I believe great makeup starts with the ‘roots’—your skin. My philosophy is all about enhancing your natural features rather than masking them. Whether you’re looking for the perfect 5-minute morning routine or a radiant glow-up for a special night, I’m here to help your inner beauty bloom through effortless, skin-loving techniques