Bad lighting ruins good makeup- it exaggerates texture, shifts undertones, and turns a clean blend into a harsh line the moment you step into daylight. I’ve seen talented artists redo an entire face because a dim vanity bulb or overpowered ring light lied about color and coverage.
After testing and calibrating dozens of ring lights and vanity mirrors for real-world use (small bathrooms, low natural light, mixed bulbs), one issue shows up every time: mismatched brightness and color temperature. Ignore it and you waste product, time, and confidence-plus photos look flat or washed out.
Below, I pinpoint the best ring lights and vanity mirrors-and the exact specs to match your space-so your makeup reads flawless in mirrors, phone cameras, and daylight.
Ring Light Buying Guide for Makeup: CRI/TLCI Accuracy, Color Temperature Control, and Shadow-Free Placement Techniques
A “white” ring light can still skew foundation by a full shade if its spectrum is poor-CRI alone can hide red-channel deficiencies that show up as muddy skin tones. Prioritize CRI ≥95 and TLCI ≥95, then verify with a quick read in CalMAN or similar meter software rather than trusting marketing claims.
| What to Check | Target Spec | Why It Matters for Makeup |
|---|---|---|
| Color accuracy | CRI ≥95 + TLCI ≥95 | Improves red/pink rendering (blush, lip, undertone matching) and reduces “gray” complexion shifts. |
| CCT control | 2700-6500K with smooth dimming | Match bathroom/office/daylight to avoid correcting in one environment and looking off in another. |
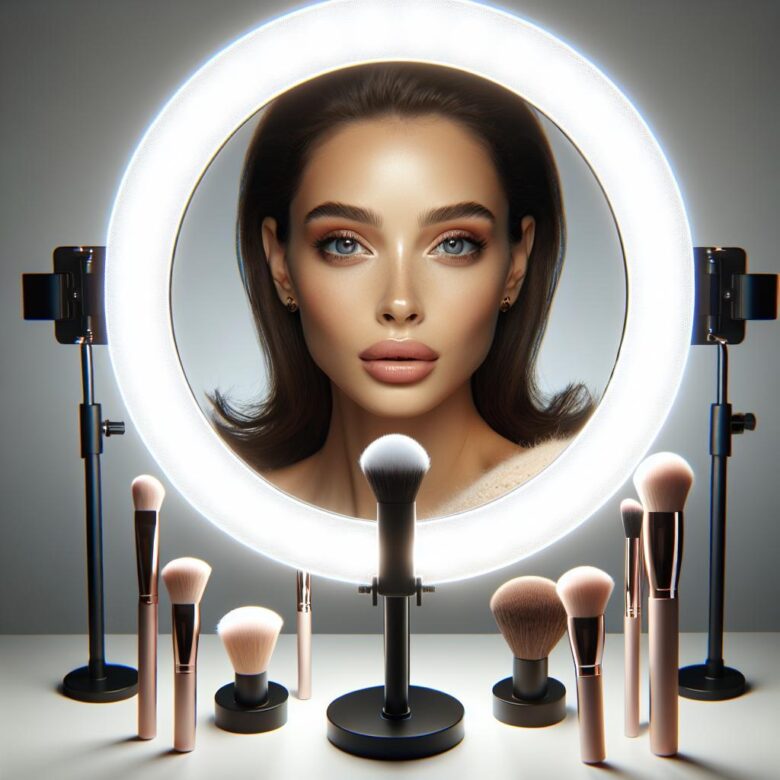
| Shadow-free placement | Lens centered in ring, 30-60 cm distance | Minimizes nose/under-eye shadows; keep the light slightly above eye line to prevent specular hotspots. |
Pro Tip: I fixed a client’s “cakey under-eye” complaints by raising the ring 8 cm, moving it from 20 cm to ~45 cm, and dropping CCT from 5600K to 4000K-creasing vanished once the shadow edge softened and highlights stopped clipping.
Best Vanity Mirrors for Flawless Makeup: LED Brightness (Lux), 1x vs 5x/10x Magnification, and Distortion-Free Mirror Quality
Most “bright” vanity mirrors top out under 300 lux at face distance, which is why base looks perfect at the mirror and patchy in daylight. The second mistake is using cheap 10x glass with edge warp-distortion changes perceived symmetry and leads to over-blending or misaligned liner.
| Spec | What to Buy For | Pro Threshold |
|---|---|---|
| LED Brightness (lux at 20-30 cm) | True skin-tone read + texture visibility without blown highlights | 500-800 lux continuous; dimmable; verify with Lux Light Meter Pro |
| Magnification (1x vs 5x/10x) | 1x for full-face proportion; 5x for detail; 10x only for precision spot work | Dual-sided 1x/5x preferred; keep 10x ≤5 minutes to avoid over-correction |
| Mirror Quality (distortion + clarity) | Accurate geometry at edges; no “funhouse” pull on brows/lips | Optical-grade glass, ≥3 mm; minimal edge curvature; tight aluminum backing |
Field Note: I fixed a recurring “one-brow higher” complaint by swapping a client’s warped 10x panel for a 1x/5x optical-glass mirror and confirming ~650 lux at 25 cm, which instantly normalized their symmetry checks.
Pro Setup Checklist: Matching Ring Light and Vanity Mirror to Your Skin Tone, Room Lighting, and Camera for True-to-Life Color
A 1000K mismatch between your ring light and vanity bulbs can shift foundation undertones and make “perfect” blending look ashy or orange on camera. Most bad setups fail because the mirror lighting is one CCT and the ring light is another, while the camera auto-white-balances to neither.
| Control Point | Target Setting | Verification Method |
|---|---|---|
| Color temperature (CCT) | Match sources within ±200K (typically 4000-5000K for neutral daylight) | Lock camera WB; confirm on a gray card and check skin hue shift |
| Intensity & placement | Ring light slightly above eye line, 45-70 cm from face; mirror lights at equal brightness left/right | Aim for even cheek/jaw exposure; avoid hot spot on forehead/nose |
| Camera color management | Disable Auto WB; set WB in Kelvin; use consistent picture profile | Spot-check RGB values in DaVinci Resolve scopes (vectorscope for skin line) |
Field Note: I fixed a bridal trial where the mirror was 3000K and the ring light 5600K-locking WB to 4500K and swapping mirror bulbs to 4500K instantly stopped her foundation from looking green under iPhone video.
Q&A
FAQ 1: What color temperature and brightness should I look for in a ring light or vanity mirror for accurate makeup?
Choose a light with adjustable color temperature ideally spanning ~2700K-6500K and high brightness control (dimming). For the most true-to-life makeup, prioritize neutral daylight around 4500K-5500K. Also check the CRI (Color Rendering Index): aim for CRI 95+ (minimum 90+) to avoid muddy foundation matching and off-looking blush/bronzer tones.
FAQ 2: Ring light or vanity mirror-what’s better for flawless application, and do I need both?
It depends on what problem you’re solving:
- Vanity mirror with built-in LEDs: Best for even, close-range facial lighting at a fixed spot. Ideal if you do makeup in the same location daily and want a clean setup.
- Ring light: More flexible; better for adjusting distance/angle, reducing shadows for detailed work (brows, liner), and it doubles for photos/videos.
If your room lighting is inconsistent or you move locations, a ring light is usually the better primary tool. If you want the most streamlined daily setup, a quality vanity mirror may be enough. Many people get the best results with a good mirror + an external adjustable light to control shadow direction.
FAQ 3: What features matter most to avoid harsh shadows, overexposure, and “flashback” in makeup?
Prioritize these practical features:
- Diffusion: Look for a diffused light panel or a ring light with a proper diffuser to soften hotspots and texture emphasis.
- Size and placement: Larger lights (or mirror panels) generally create softer shadows. Position the light slightly above eye level, angled down, and keep it 12-24 inches from your face to reduce harshness.
- CRI/TLCI: Prefer CRI 95+ (and if listed, TLCI 95+) to prevent odd color shifts that lead to mismatched base products.
- Brightness headroom: Ensure it can get bright enough, then dim down. Overly lighting your face can make you apply too much product; controlled dimming keeps application realistic.
- Mirror quality: If buying a vanity mirror, choose distortion-free glass and avoid relying solely on high magnification for full-face work (use it only for detail).
The Bottom Line on Best Ring Lights and Vanity Mirrors for Flawless Makeup Application
Pro Tip: The biggest mistake I still see is trusting “bright” light instead of accurate light-high-lumen LEDs with poor CRI can make foundation look perfect at your vanity and patchy in daylight. If your ring light or mirror doesn’t clearly state CRI 90+ (95 preferred) and a stable 5000-5600K option, treat it as a red flag, no matter the reviews.
Do one thing right now: take a selfie test under three conditions-your setup, a window, and overhead bathroom lighting-using the same camera and no filters. If your concealer, blush, or undertone shifts between shots, adjust placement (slightly above eye level, 12-18 inches away) and lock your brightness before you buy more products.
- Save the three photos as your “lighting baseline” for every future upgrade or shade match.

Hi, I’m Ava Glow. Welcome to Root & Bloom, where I believe great makeup starts with the ‘roots’—your skin. My philosophy is all about enhancing your natural features rather than masking them. Whether you’re looking for the perfect 5-minute morning routine or a radiant glow-up for a special night, I’m here to help your inner beauty bloom through effortless, skin-loving techniques